
testNG를 사용하면 좋은점은 단위별로 쪼개거나 합쳐서 테스트 실행도 가능하지만, 그 결과를 볼 수 있는 간략화 된 자료도 있다는 사실이다.
그래서, Eclipse에서 test-output파일안에는 테스트 결과를 확인할수 있는 emailable-report.html 파일이 존재한다.
어떤 클래스를 사용했는지 성공했는지, 실패했는지 그리고 총 걸린 시간을 ms으로 보여준다.
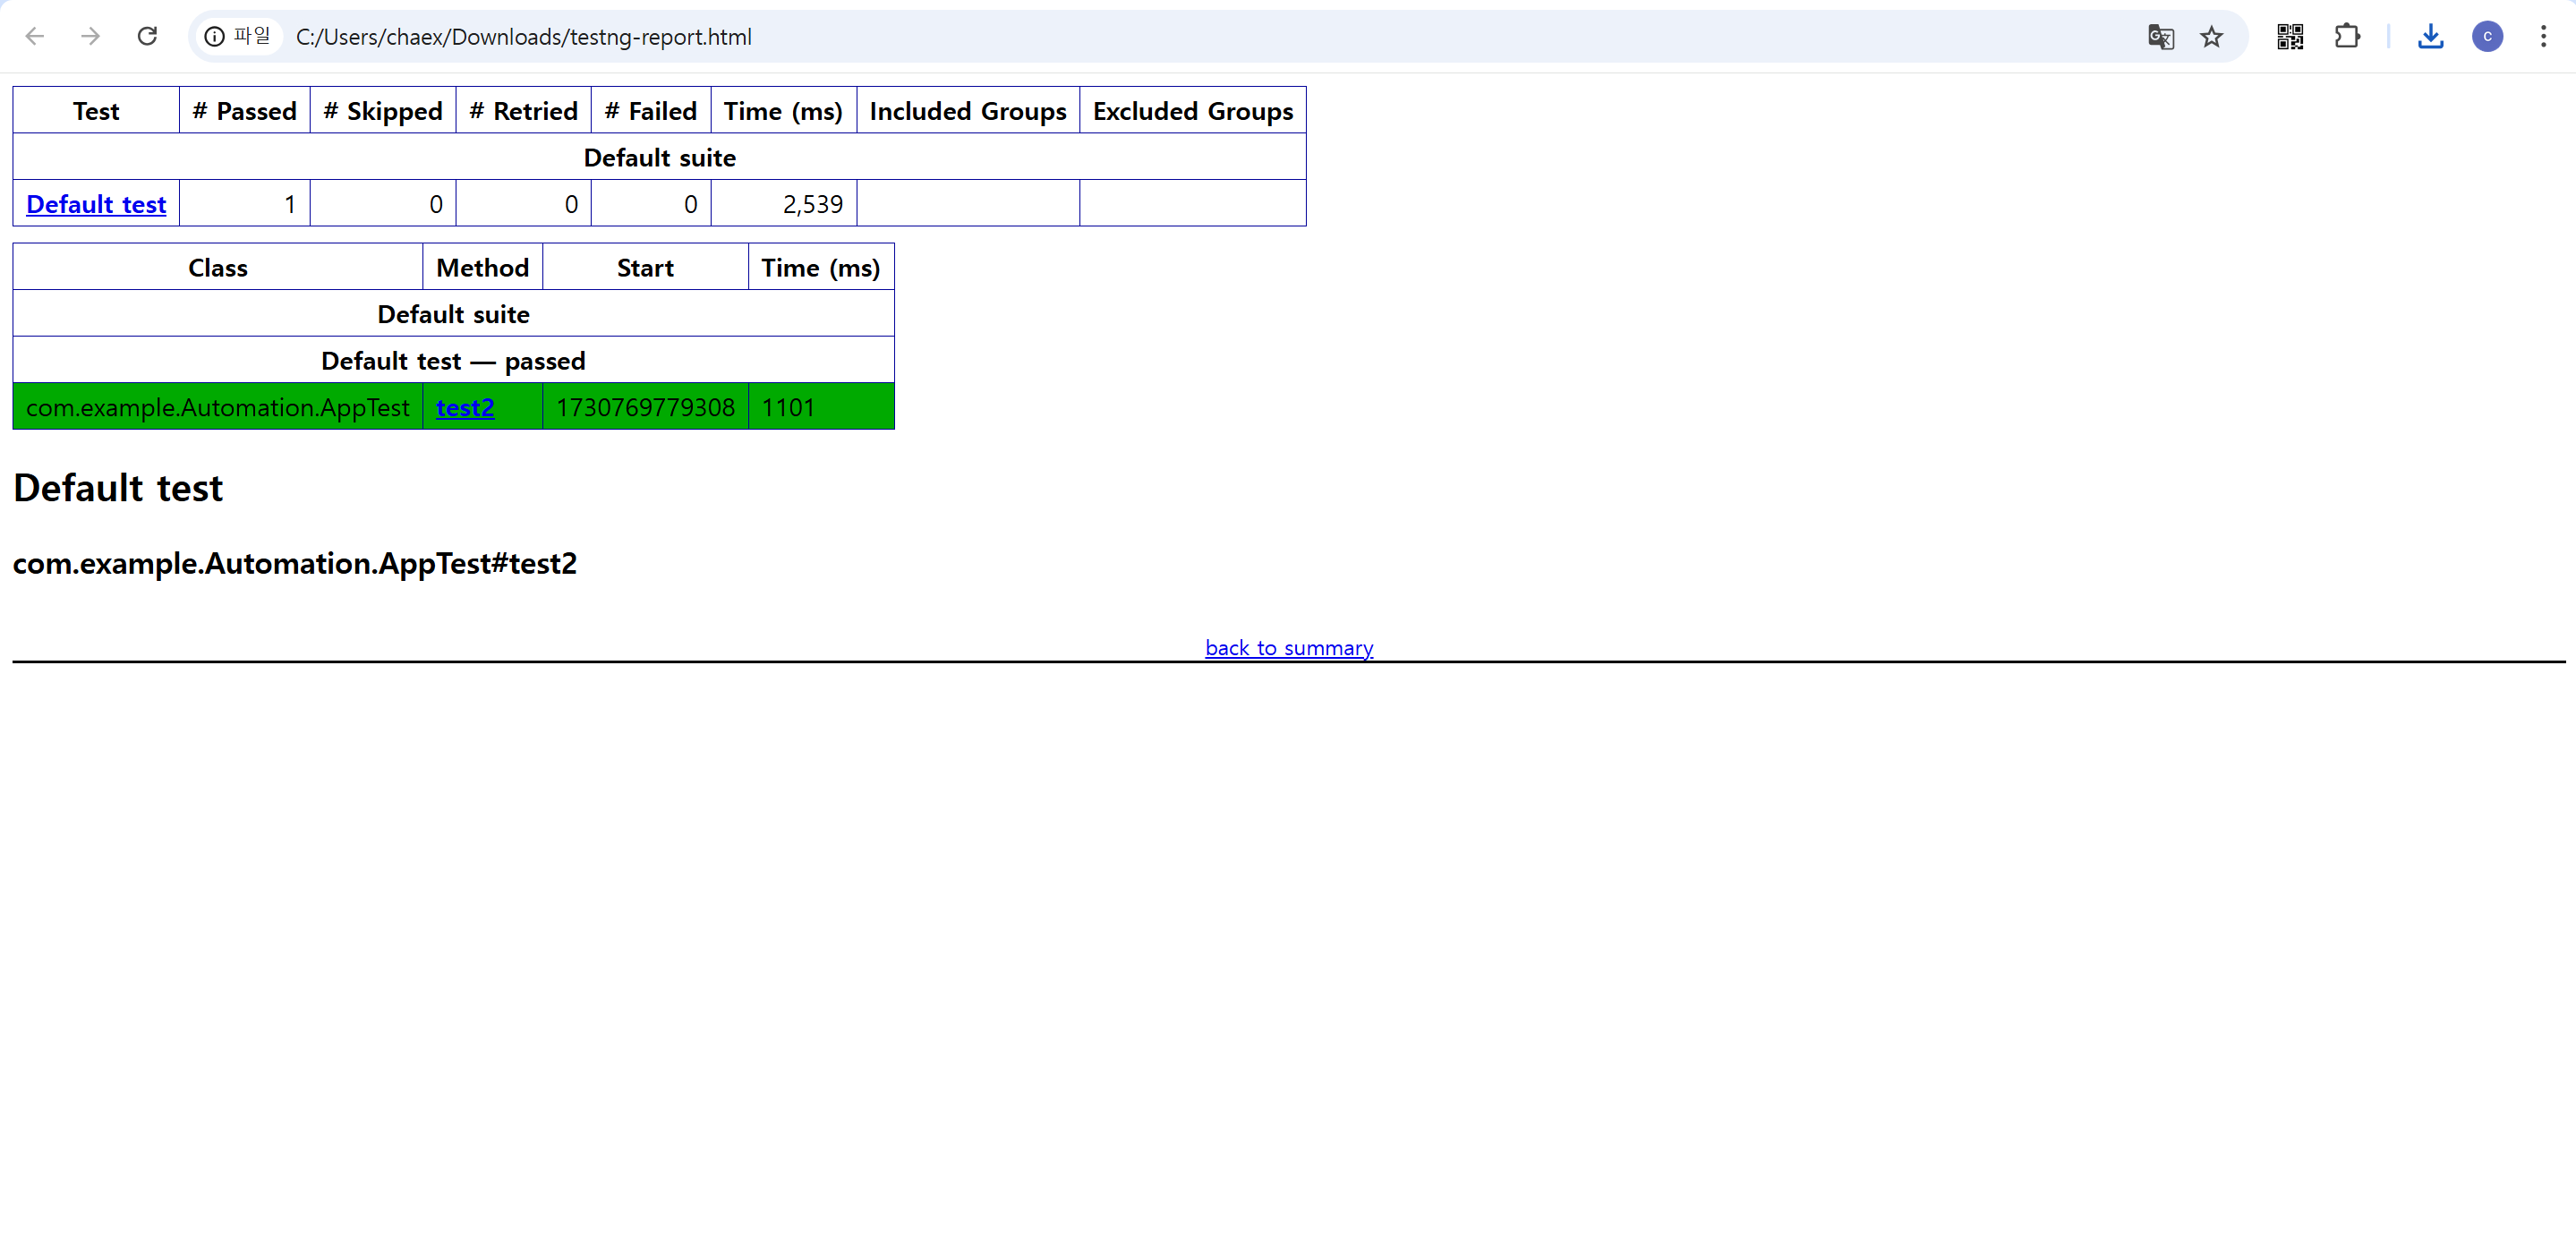
즉, 이 결과만을 가지고 실행한 자동화테스트가 잘 진행되었는지, 실패한 부분은 없는지 알 수 있다.
그래서 자동화 테스트 결과를 확인할때 이 파일을 관련자들에게 모두 공유한다면 편리할거 같아 자바 SMTP로 이메일을 받는 방법에 대해 공유해보고자 포스팅을 한다.
목표
testng를 사용하면 결과인 emailable-report.html파일을 볼 수 있는데, 이 파일을 메일로 첨부해서 결과를 관련자들이 모두 메일로 확인할 수 있게 한다.
관련예시는 네이버 메일을 통해 받는 방법을 사용했다.
1. java의 SMTP기능을 하용하기 위해 pom.xml 파일에 dependency를 추가해주어야 한다.
<dependency>
     <groupId>javax.mail</groupId>
     <artifactId>javax.mail-api</artifactId>
    <version>1.6.2</version>
</dependency>
<dependency>
    <groupId>com.sun.mail</groupId>
    <artifactId>javax.mail</artifactId>
    <version>1.6.2</version>
</dependency>
2. 그리고 이메일을 보낼 네이버 이메일에서도 설정을 해주어야 한다.
먼저, IMAP 사용으로 바꾸어준다. 구글이메일을 사용하는 경우는 아래 페이지에서 바꿀 수 있다.
https://mail.google.com/mail/u/0/?tab=rm&ogbl#settings/fwdandpop (google)
네이버 이메일의 경우에는, 해당 메일 환경설정에서 변경할 수 있다.
smtp를 사용하는 서버와 번호는 나와있다.

3. 그리고 메일을 보낼 클래스를 구축해둔 자동화 maven project에 추가해준다.
메일의 제목은 message.setSubject("테스트결과 메일입니다."); 를 이용해서 추가해주고
내용은 messageBodyPart.setText("테스트 자동화 결과입니다.");를 사용했다.
그리고 가장 중요한 파일 첨부는 다음과 같은 함수를 사용했다.
String reportPath = "파일경로/test-output/emailable-report.html";
MimeBodyPart attachmentPart = new MimeBodyPart();
attachmentPart.attachFile(new File(reportPath));
attachmentPart.setFileName("testng-report.html");
multipart.addBodyPart(attachmentPart);
전체 메일 보내는 클래스의 소스코드는 다음과 같다.
package com.example.Automation;

import java.io.File;
import java.util.Properties;

import javax.mail.Message;
import javax.mail.MessagingException;
import javax.mail.PasswordAuthentication;
import javax.mail.Session;
import javax.mail.Transport;
import javax.mail.internet.InternetAddress;
import javax.mail.internet.MimeBodyPart;
import javax.mail.internet.MimeMessage;
import javax.mail.internet.MimeMultipart;

public class ResultMail {

    // 이메일
    static final String user_email= "EMAILID@naver.com";
    //비번
    static final String user_pw = "password";

    static final String smtp_host = "smtp.naver.com";
    static final int smtp_port = 587;  // TLS : 587, SSL : 465

    public static void Send() throws Exception {
        Properties props = System.getProperties();
        props.put("mail.smtp.host", smtp_host);
        props.put("mail.smtp.port", smtp_port);
        props.put("mail.smtp.auth", "true");
        props.put("mail.smtp.starttls.enable", "true");
        props.put("mail.smtp.ssl.trust", smtp_host);

        Session session = Session.getInstance(props,
                new javax.mail.Authenticator() {
                    protected PasswordAuthentication getPasswordAuthentication() {
                        return new PasswordAuthentication(user_email, user_pw);
                    }
                });

        try {

            Message message = new MimeMessage(session);
            message.setFrom(new InternetAddress(user_email));


            message.setRecipients(
                    Message.RecipientType.TO,
                    InternetAddress.parse("받는 이메일주소 입력")
            );


            message.setSubject("제목입력");

            String reportPath = "/C:/Users/???/eclipse-workspace/Automation/test-output/emailable-report.html"; // 리포트 경로


            MimeBodyPart messageBodyPart = new MimeBodyPart();
            messageBodyPart.setText("본문 내용");

            MimeMultipart multipart = new MimeMultipart();
            multipart.addBodyPart(messageBodyPart);

            // 파일 첨부
            MimeBodyPart attachmentPart = new MimeBodyPart();
            attachmentPart.attachFile(new File(reportPath));
            attachmentPart.setFileName("testng-report.html"); // 파일 이름 설정"
            multipart.addBodyPart(attachmentPart);

            // 최종적으로 메일에 multipart 추가
            message.setContent(multipart);

            // 발송
            Transport.send(message);

        } catch (MessagingException e) {
            e.printStackTrace();
            System.out.println(e.getMessage());
        }
    }
}
이렇게 작성해주고 testng에서 suite가 종료될때마다(=테스트가 완료된 경우) 해당 함수를 넣어주면, 결과가 자동으로 메일로 오게된다.
 @AfterSuite
    public void email() throws Exception {
     ResultMail.Send();
  }
그러면 아래와 같이 이메일을 확인할 수 있다.

